

In this post, we will learn how to create a fully functional search bar in React. This will allow you to implement a search feature in your React application.
5 Steps to Create a Search Bar in React
- Create the search bar UI.
- Add the dummy content.
- Map data to form the list.
- Store user input.
- Filter the data using the filter function.
We will start by setting up some sample content and then proceed to create the search bar.
How to Add a Search Bar in React.JS
1. Create the Search Bar
To create the search bar, we will start by creating a basic text field. For this tutorial, we will use Material UI, an excellent React UI library that provides various components. Follow these steps to install Material UI using npm:
npm install @mui/materialIn your app.js, import the text field component from Material UI. We will use the outlined variant of the text field.
import { React, useState } from "react";
import TextField from "@mui/material/TextField";
import List from "./Components/List"
import "./App.css";

function App() {
  return (
    <div className="main">
      <h1>React Search</h1>
      <div className="search">
        <TextField
          id="outlined-basic"
          variant="outlined"
          fullWidth
          label="Search"
        />
      </div>
      <List />
    </div>
  );
}

export default App;
You may notice a few things here. We are importing a file called List.js, which we will create now. This will contain our list of dummy data.
Next, add the following CSS to your App.css:
.main {
    display: flex;
    height: 100vh;
    width: 100%;
    align-items: center;
    flex-direction: column;
    row-gap: 20px;
}

h1 {
    margin: 10px;
    font-size: 40px;
    color: rgb(1, 1, 59);
}

.search {
    width: 30%;
}

ul li {
    font-size: 20px;
}
2. Add the Dummy Content
Create a new folder in your src folder called Components. Within this, create two files, a JSON file called ListData.JSON and the list.js file.
For the sample text or content, I used Mockaroo. You can get all sorts of realistic test data from here. For this example, you can use my ListData.JSON too:
[{
    "id": 1,
    "text": "Devpulse"
}, {
    "id": 2,
    "text": "Linklinks"
}, {
    "id": 3,
    "text": "Centizu"
}, {
    "id": 4,
    "text": "Dynabox"
}, {
    "id": 5,
    "text": "Avaveo"
}, {
    "id": 6,
    "text": "Demivee"
}, {
    "id": 7,
    "text": "Jayo"
}, {
    "id": 8,
    "text": "Blognation"
}, {
    "id": 9,
    "text": "Podcat"
}, {
    "id": 10,
    "text": "Layo"
}]
3. Map Data to Form the List
Now, we will map this data in the form of a List. Inside the List.JS file, add the following code:
import { React, useState } from 'react'
import data from "./ListData.json"

function List(props) {
    return (
        <ul>
            {data.map((item) => (
                <li key={item.id}>{item.text}</li>
            ))}
        </ul>
    )
}

export default List
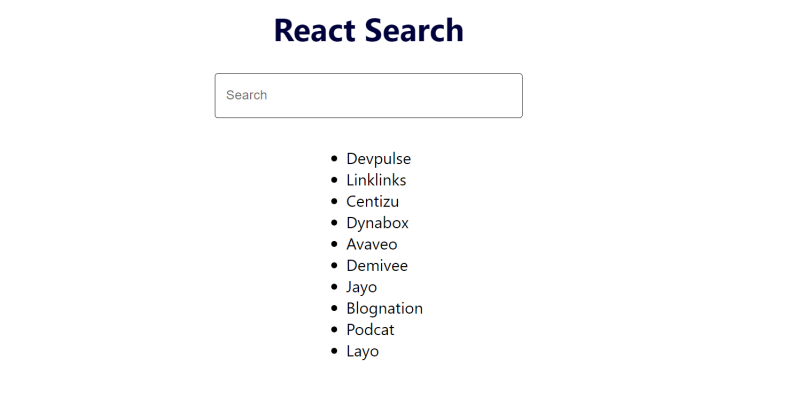
Your page should be looking like this now:
4. Store User Input
Now, we need to store the user input in a state. We will do this using the onChange event handler on the text field and a function that updates a state every time the user types something.
Always convert the input text to lower case when creating a search bar.
We will also pass down the state to the list component in the form of props. Your App.js will look like this now:
import { React, useState } from "react";
import TextField from "@mui/material/TextField";
import List from "./Components/List";
import "./App.css";

function App() {
  const [inputText, setInputText] = useState("");
  let inputHandler = (e) => {
    //convert input text to lower case
    var lowerCase = e.target.value.toLowerCase();
    setInputText(lowerCase);
  };

  return (
    <div className="main">
      <h1>React Search</h1>
      <div className="search">
        <TextField
          id="outlined-basic"
          onChange={inputHandler}
          variant="outlined"
          fullWidth
          label="Search"
        />
      </div>
      <List input={inputText} />
    </div>
  );
}

export default App;
5. Filter the Data Using the Filter Function
Now, we will filter the data using the filter function, creating a new array called filteredData. We will map this array in place of the original. We will convert the list data to lower case as well to match the user input. The user input can be accessed using props. This will be your List.js:
import { React, useState } from 'react'
import data from "./ListData.json"

function List(props) {
    //create a new array by filtering the original array
    const filteredData = data.filter((el) => {
        //if no input the return the original
        if (props.input === '') {
            return el;
        }
        //return the item which contains the user input
        else {
            return el.text.toLowerCase().includes(props.input)
        }
    })
    return (
        <ul>
            {filteredData.map((item) => (
                <li key={item.id}>{item.text}</li>
            ))}
        </ul>
    )
}

export default List
6. Result
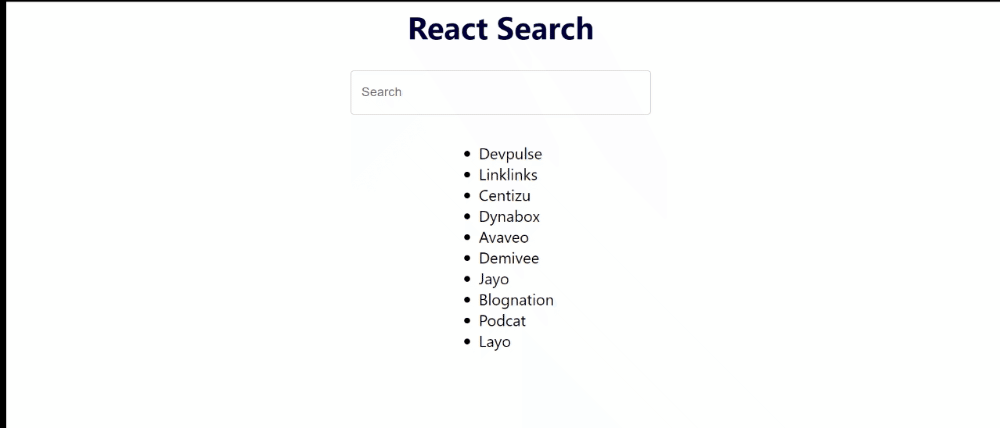
Your functional Search Bar will be looking like this:
And you are done.
Frequently Asked Questions
How do you create a search bar in React?
- Create the search bar UI with the Material UI library.
- Add the dummy content.
- Map data to form the list.
- Store user input.
- Filter the data using the filter function.


