So, you’re using Discord as a messaging application, and you think to yourself, “Hey, maybe I should make myself a bot.” This tutorial introduces the basic steps needed to build a working Discord bot using Python.
5 Steps to Creating a Discord Bot in Python
- Install
discord.py. - Create a Discord application and bot.
- Create a Discord guild server (guild).
- Add the bot into the server.
- Code the bot.
1. Install Discord.py
There are several libraries out there to access Discord’s API, each with their own traits, but ultimately, they all achieve the same thing. Since we are focusing on Python, discord.py is probably the most popular wrapper.
Assuming you already have Python and pip installed, you’re going to want to run this command:
pip install discord.pydiscord.py has some requirements that will automatically be installed if your machine doesn’t already have them. Once you run this command, you should see something along the lines of this:
Installing collected packages: discord.py
Successfully installed discord.py-[version-number]
Success. You now have access to Discord’s API. Before we get into coding a Discord bot’s version of “Hello World,” we need to set up a few other things first.
2. Create a Discord Application and Bot
Before getting into the code, we need to create a “Discord application.” This is essentially an application that holds a bot. It can be accessed on Discord.
If you don’t have a Discord account, then you’re going to want to create one. The Discord application page should look something like this:
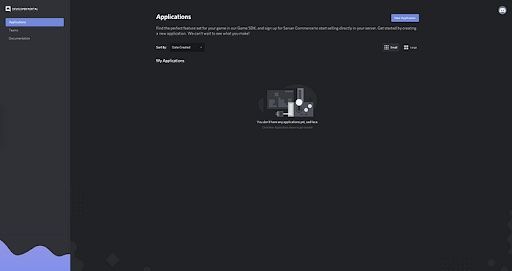
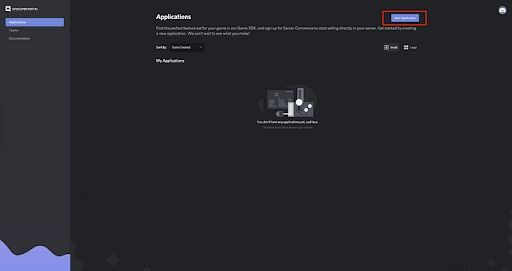
Once you are on this page, you’re going to want to go to the “New Application” button:
After you click on the button, you’ll be prompted to name your application:
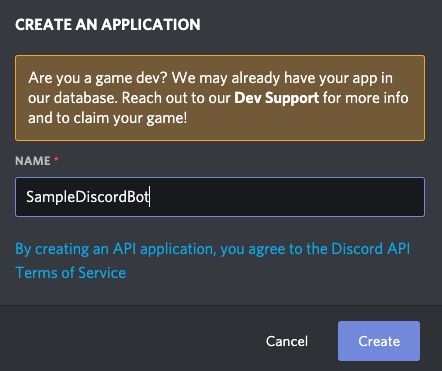
I’m going to name mine “SampleDiscordBot,” but you can name it anything you want.
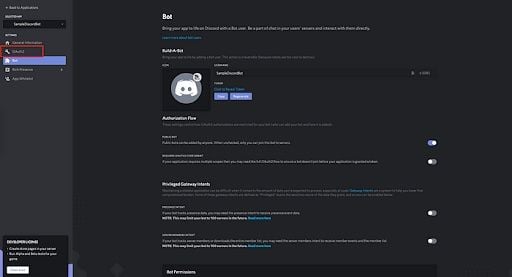
Once you’ve created your application, you get brought to a menu that looks like this:
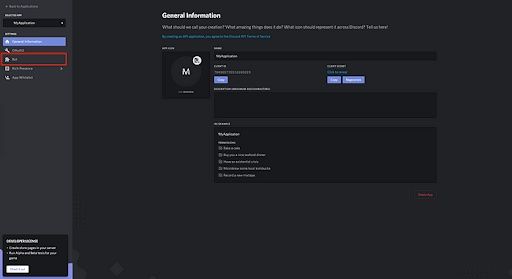
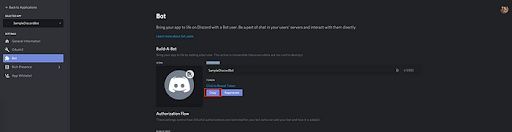
There’s a lot of information and settings here, but as of right now, we only really care about the “Bot” setting on the left-hand side. Let’s go ahead and click that to get us to the bot page:
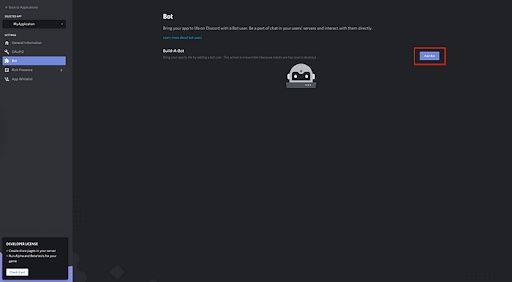
We then want to click on the “Add Bot” button. A pop-up will come up asking if you want to tie a bot to your application. You’ll want to click the “Yes, do it!” button to confirm.
A bot has now been created and is attached to the application. We are going to need to create a brand new Discord server, or “guild” as the API likes to call it, so that we can drop the bot in to mess around with it.
3. Create a Discord Server (Guild)
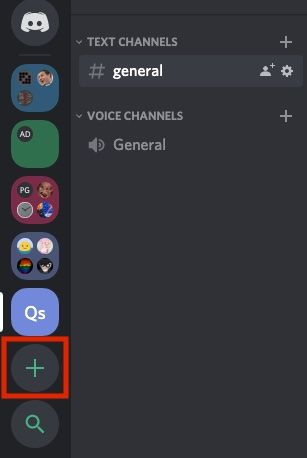
Now that we have our bot up and running, we are going to need to create a new server so that we have a sandbox for the bot. Creating a Discord server is simple. Just click on the plus button on the left-hand side when inside of Discord:
You’ll get prompted with a menu to name your server. You can name the server anything you want, but I typically name it after the bot and treat it like a development environment.
We just need to add the bot to the server and then we can finally dig into the code.
4. Add the Discord Bot into the Discord Server
In order for us to play around with the bot, we are going to need to add it to a server. This is also a pretty easy step. Go to the Discord developer portal and login to your Discord account. Then, click the “OAuth2” section within the Discord application:
After we enter the OAuth2 section, we see a screen with a bunch of checkboxes. We want to make sure we click on the box labeled “bot.”
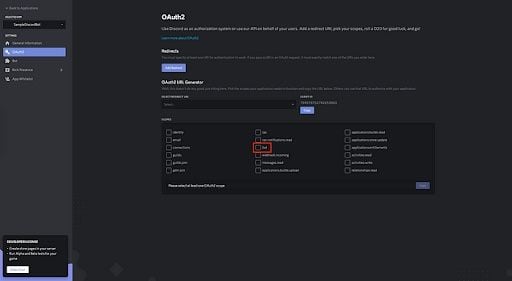
After we select that checkbox, a URL should appear directly below that:
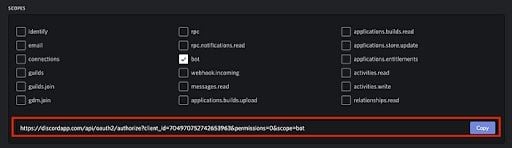
Copy the URL and paste it in your browser. This link allows your bot to join any server your user has permissions to join using OAuth2. If you have added bots into a server before, this step should feel pretty familiar. For those of you who haven’t, when you hit this URL, you’ll get prompted with a menu similar to this:
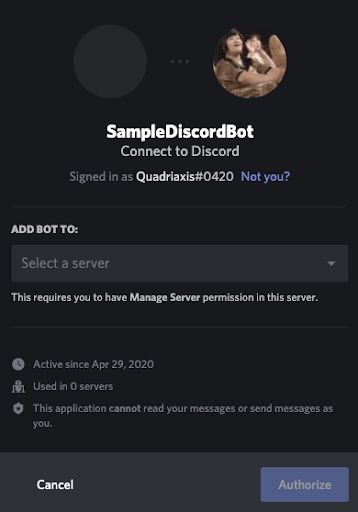
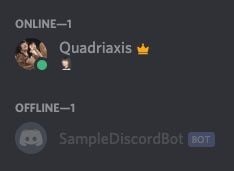
Go ahead and select the server you created from the dropdown and click on “Authorize.” This will drop the bot into your server. A message will show up in your server indicating that the bot has joined:

You’ll also see your bot in the user list on the right-hand side of Discord’s interface:
Now that the bot has entered the server, we can finally get into coding a basic bot.
5. Code the Discord Bot
Let’s go ahead and create a new Python file somewhere on your machine. I’m going to call mine main.py. The contents of the file are going to look like this:
# IMPORT DISCORD.PY. ALLOWS ACCESS TO DISCORD'S API.
import discord

# GETS THE CLIENT OBJECT FROM DISCORD.PY. CLIENT IS SYNONYMOUS WITH BOT.
bot = discord.Client()

# EVENT LISTENER FOR WHEN THE BOT HAS SWITCHED FROM OFFLINE TO ONLINE.
@bot.event
async def on_ready():
	# CREATES A COUNTER TO KEEP TRACK OF HOW MANY GUILDS / SERVERS THE BOT IS CONNECTED TO.
	guild_count = 0

	# LOOPS THROUGH ALL THE GUILD / SERVERS THAT THE BOT IS ASSOCIATED WITH.
	for guild in bot.guilds:
		# PRINT THE SERVER'S ID AND NAME.
		print(f"- {guild.id} (name: {guild.name})")

		# INCREMENTS THE GUILD COUNTER.
		guild_count = guild_count + 1

	# PRINTS HOW MANY GUILDS / SERVERS THE BOT IS IN.
	print("SampleDiscordBot is in " + str(guild_count) + " guilds.")

# EVENT LISTENER FOR WHEN A NEW MESSAGE IS SENT TO A CHANNEL.
@bot.event
async def on_message(message):
	# CHECKS IF THE MESSAGE THAT WAS SENT IS EQUAL TO "HELLO".
	if message.content == "hello":
		# SENDS BACK A MESSAGE TO THE CHANNEL.
		await message.channel.send("hey dirtbag")

# EXECUTES THE BOT WITH THE SPECIFIED TOKEN. TOKEN HAS BEEN REMOVED AND USED JUST AS AN EXAMPLE.
bot.run("NzA0OTcwNzUyNzQyNjUzOTYz.Xqk5ww.1U_-WdW4aeGWCNF7bOJkLAu_2TM")
The on_ready() and on_message() functions are event listeners associated with the Discord bot, as noted by the @bot.event annotations. These are fairly straightforward. One happens when the bot starts up when the main.py is run. The print statement will show this in your terminal:
- 704974365309141042 (name: Quadriaxis's server)
SampleDiscordBot is in 1 guilds.
You can use this as a tool to log information as you see fit. I am simply using this to do a quick little count to check how many guilds/servers the bot is connected to and some data about the guilds/servers.
The on_message() function listens for any message that comes into any channel that the bot is in. Each message that is sent on the Discord side will trigger this function and send a Message object that contains a lot of information about the message that was sent. Things like the channel, who sent the message, etc. I'm using this function to simply check if the message that was sent is equal to “hello.” If it is, then our bot replies with a very welcoming phrase back.
Now that the event listeners have been covered, I’m going to focus on some of the more important pieces that are happening in this code block.
How the Discord Bot Code Works
The pieces that are needed in order for the bot to run are:
# Import the os module.
import os

# Import load_dotenv function from dotenv module.
from dotenv import load_dotenv

# Loads the .env file that resides on the same level as the script.
load_dotenv()

# Grab the API token from the .env file.
DISCORD_TOKEN = os.getenv("DISCORD_TOKEN")
These lines import Discord’s API, create the Client object that allows us to dictate what the bot can do, and lastly run the bot with our token.
How and Where to Find Your Discord Bot Token
Speaking of the token, to get your bot’s token, just go to the bot page within the Discord developer portal and click on the “Copy” button.
If you are familiar with API tokens, then this is it. If you aren’t, then this is a special string that identifies your bot. It allows you to access your bot from your program. Never share your bot token and treat it like a password — if compromised, others can control your bot.
Storing Discord Bot Tokens
A common practice to store these types of tokens would be to use some sort of hidden file that your program pulls the string from so that they aren’t committed to a VCS. python-dotenv is a popular package that does this for us. Let’s go ahead and install this package so that we can secure our token.
Run this command in your terminal:
pip install python-dotenvThis will install python-dotenv on our machine. This will allow us to use a .env file to store our token. Create a .env file in the same directory level as your main.py. The contents of the .env should look like this:
DISCORD_TOKEN="NzA0OTcwNzUyNzQyNjUzOTYz.Xqk5ww.1U_-WdW4aeGWCNF7bOJkLAu_2TM"
Now that we have our API token inside this file, we can retrieve it within main.py by adding these lines to our existing code:
# Import the os module.
import os
# Import load_dotenv function from dotenv module.
from dotenv import load_dotenv
# Loads the .env file that resides on the same level as the script.
load_dotenv()
# Grab the API token from the .env file.
DISCORD_TOKEN = os.getenv("DISCORD_TOKEN")
Since we have the DISCORD_TOKEN, we can replace the hardcoded API token with this variable at the bottom of the program:
# Executes the bot with the specified token.
bot.run(DISCORD_TOKEN)
Resulting in the final main.py file looking like this:
# IMPORT DISCORD.PY. ALLOWS ACCESS TO DISCORD'S API.
import discord

# IMPORT THE OS MODULE.
import os

# IMPORT LOAD_DOTENV FUNCTION FROM DOTENV MODULE.
from dotenv import load_dotenv

# LOADS THE .ENV FILE THAT RESIDES ON THE SAME LEVEL AS THE SCRIPT.
load_dotenv()

# GRAB THE API TOKEN FROM THE .ENV FILE.
DISCORD_TOKEN = os.getenv("DISCORD_TOKEN")

# GETS THE CLIENT OBJECT FROM DISCORD.PY. CLIENT IS SYNONYMOUS WITH BOT.
bot = discord.Client()

# EVENT LISTENER FOR WHEN THE BOT HAS SWITCHED FROM OFFLINE TO ONLINE.
@bot.event
async def on_ready():
	# CREATES A COUNTER TO KEEP TRACK OF HOW MANY GUILDS / SERVERS THE BOT IS CONNECTED TO.
	guild_count = 0

	# LOOPS THROUGH ALL THE GUILD / SERVERS THAT THE BOT IS ASSOCIATED WITH.
	for guild in bot.guilds:
		# PRINT THE SERVER'S ID AND NAME.
		print(f"- {guild.id} (name: {guild.name})")

		# INCREMENTS THE GUILD COUNTER.
		guild_count = guild_count + 1

	# PRINTS HOW MANY GUILDS / SERVERS THE BOT IS IN.
	print("SampleDiscordBot is in " + str(guild_count) + " guilds.")

# EVENT LISTENER FOR WHEN A NEW MESSAGE IS SENT TO A CHANNEL.
@bot.event
async def on_message(message):
	# CHECKS IF THE MESSAGE THAT WAS SENT IS EQUAL TO "HELLO".
	if message.content == "hello":
		# SENDS BACK A MESSAGE TO THE CHANNEL.
		await message.channel.send("hey dirtbag")

# EXECUTES THE BOT WITH THE SPECIFIED TOKEN. TOKEN HAS BEEN REMOVED AND USED JUST AS AN EXAMPLE.
bot.run(DISCORD_TOKEN)
Congratulations, you’ve made your first bot. We’ve only scratched the surface so far, but this is a great starting point. Topics like bot commands weren’t even covered in this article. A lot more documentation and helpful information can be found on the official discord.py API Reference page. Having a good understanding of how to read the API will not only make you a better developer, but it will allow you to build whatever type of Discord bot that you want.
Frequently Asked Questions
What is a Discord bot in Python?
A Discord bot in Python is a program that connects to Discord’s API using the discord.py library, allowing it to automate tasks and interact with users in a Discord server.
How do I install the discord.py library?
You can install discord.py in Python by running the command: pip install discord.py.
How do I add my bot to a Discord server?
After creating your own Discord application and bot, go to the Discord developer portal, click the OAuth2 section then select the “bot” scope. This will generate a URL, which you can use to authorize your bot to join a Discord server you manage.