CUDA is a computing platform and library from NVIDIA that utilizes parallel computing to make it faster and easier for users to access and command the graphical processing unit for general use. CUDA deep neural network (cuDNN) is a GPU library designed for deep neural network use.
What is CUDA Deep Neural Network (cuDNN)?
CUDA deep neural network (cuDNN) is a GPU library offered by NVIDIA that is explicitly designed for deep neural network use. It can be downloaded on both Windows and Linux.
Here’s how to download both for Windows and Linux.
CUDA and cuDNN Download for Windows
Download CUDA for Windows
Go to NVIDIA’s site to download the latest CUDA Toolkit. You can also download previous versions from the Archive of Previous CUDA Releases under the “Resources” section on the same page .
For this tutorial, I will download and install CUDA 11.0. You can use the latest CUDA toolkit and its corresponding cuDNN file. This is just for demonstration.
Go to Archive of Previous CUDA Releases and click on CUDA Toolkit 11.0 Update1.
On the next page, first, choose your operating system as Windows.
Next, choose your Architecture and version. For my system, the architecture is x86_64, as I have a 64-bit system, and the version of Windows is 10. To find your system’s architecture in Windows, go to Control Panel -> System and Security -> System. It will be mentioned as system type.
Next, choose any installer type to download. I have downloaded the exe (local) type installer.
You will then see the installation instructions using the base installer which is 2.7 GB in size. Once downloaded, click on the exe file and follow on-screen prompts.

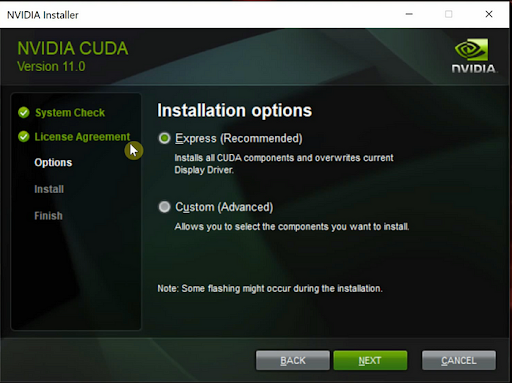
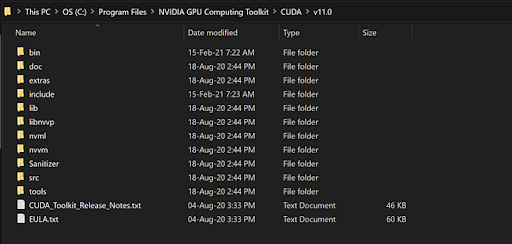
When the setup starts, select a location to extract the installer. Once that is done the CUDA installer will start. In the CUDA installer, choose Express installation and click on “Next.” This will install the “CUDA Toolkit” on your system in the location C:\Program Files\NVIDIA GPU Computing Toolkit.
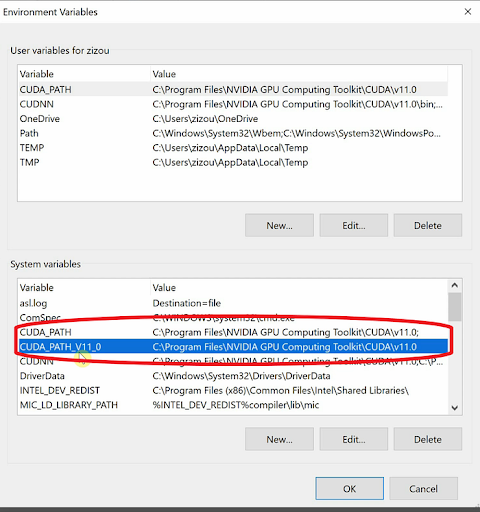
Next, make sure to check if your environment variables have the path to CUDA as shown in the image. It should automatically add the second path. If it doesn’t, then manually add them to the system variables.
CUDA_PATH→C:\Program Files\NVIDIA GPU Computing Toolkit\CUDA\v11.0CUDA_PATH_V11_0→C:\Program Files\NVIDIA GPU Computing Toolkit\CUDA\v11.0
Download CUDNN for Windows
Go to NVIDIA’s cuDNN page to download the latest version of cuDNN for the latest CUDA toolkit version. Or go to the archive to download a previous version of cuDNN that is compatible with your CUDA toolkit.
You have to be signed in using your NVIDIA account to download cuDNN. If you don’t have an account, create one.
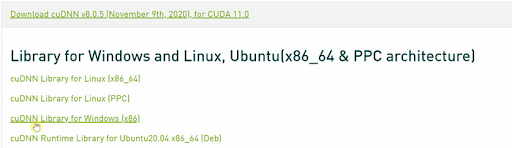
Since I have CUDA 11.0.1, I will download cuDNN 8.0.5 for CUDA 11.0
Click on “cuDNN 8.0.5” and select “cuDNN Library for Windows (x86).”
Next, it will ask you to log in. Create an Nvidia account or sign in using Google or Facebook. Once logged in you can download the cuDNN. Download and extract it.
Copy the contents of the CUDA folder inside the cuDNN folder to the path where we installed CUDA in the first step above. We need the contents of the “bin,” “include” and “lib” folders from cuDNN to be inside the “bin,” “include” and “lib” folders of the CUDA directory.
Copy contents from the folder below:
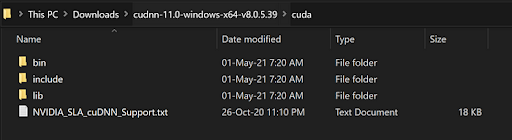
To this folder:
Finally, just like we did for CUDA, we have to set the environment variable for cuDNN as well.
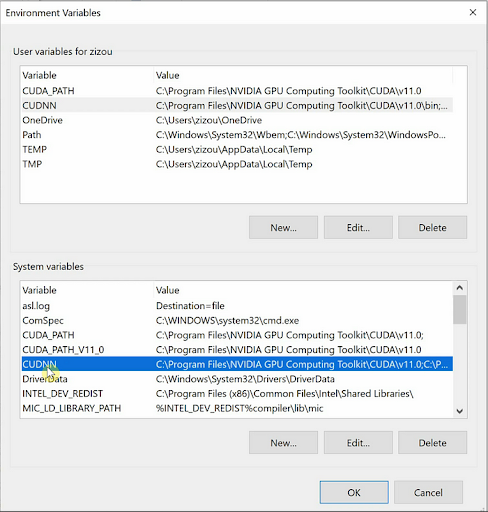
Set the system variable with the name cuDNN to point to the “bin,” “include” and “lib folders,” which we copied into the CUDA directory. Also, add these same paths to the Path System variable.
The paths to add are mentioned below:
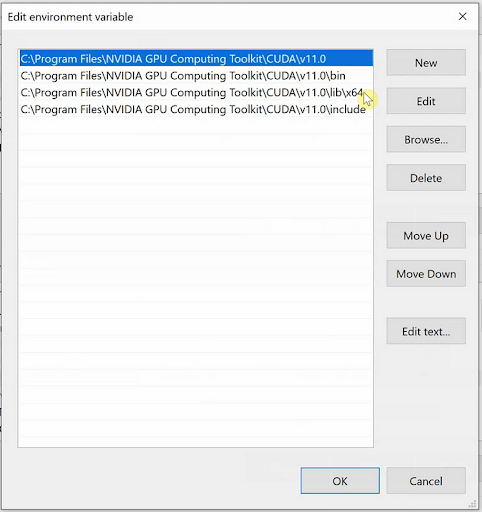
C:\Program Files\NVIDIA GPU Computing Toolkit\CUDA\v11.0C:\Program Files\NVIDIA GPU Computing Toolkit\CUDA\v11.0\binC:\Program Files\NVIDIA GPU Computing Toolkit\CUDA\v11.0\includeC:\Program Files\NVIDIA GPU Computing Toolkit\CUDA\v11.0\lib
Make sure to add these paths to both the cuDNN and path system variables.
That’s it. We have successfully set up CUDA and cuDNN on our Windows System.
CUDA and cuDNN Download for Linux
Download CUDA for Linux
Go to NVIDIA’s website to download the latest CUDA toolkit. You can also download previous versions from the “Archive of Previous CUDA Releases” under the “Resources” section on the same page given above.
Once again, I will download and install CUDA 11.0 for this demonstration. If you’d like to follow along, go to the archive page and click on CUDA Toolkit 11.0 Update1.
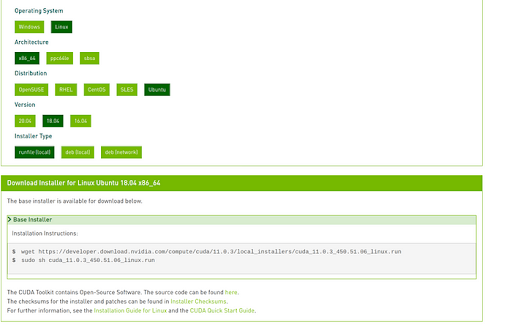
First, choose your operating system as Linux.
Next, choose your architecture, distribution and version. For my system, the architecture is x86_64 as I have a 64-bit Ubuntu system, and the version of Ubuntu is 18.04.
Next, choose any installer type to download. I have downloaded the “runfile (local) type” installer.
You will then see a few commands in the installation instructions for the base installer.
Then, open a terminal and run the following commands to update and upgrade all the packages on your Ubuntu.
sudo apt-get updatesudo apt-get upgrade
Next, install all the necessary dependencies.
sudo apt-get install build-essential cmake unzip pkg-config
sudo apt-get install build-essential cmake unzip pkg-config
sudo apt-get install gcc-6 g++-6
sudo apt-get install libxmu-dev libxi-dev libglu1-mesa libglu1-mesa-dev
sudo apt-get install libjpeg-dev libpng-dev libtiff-dev
sudo apt-get install libavcodec-dev libavformat-dev libswscale-dev libv4l-dev
sudo apt-get install libxvidcore-dev libx264-dev
sudo apt-get install libopenblas-dev libatlas-base-dev liblapack-dev gfortran
sudo apt-get install libhdf5-serial-dev
sudo apt-get install python3-dev python3-tk python-imaging-tk
sudo apt-get install libgtk-3-dev
Next, add the ppa:graphics-drivers/ppa repository into your system.
sudo add-apt-repository ppa:graphics-drivers/ppa
sudo apt update
Install the NVIDIA driver compatible with your CUDA version. For CUDA 11.0 the minimum driver version for Linux is “>= 450.36.06.”
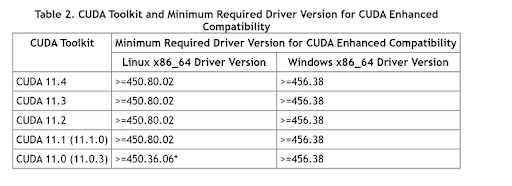
sudo apt-get install nvidia-driver-450You can read about the minimum driver versions required.
Create a folder and run the commands from the installation instructions for the base installer.
cd ~
mkdir installers
cd installers/
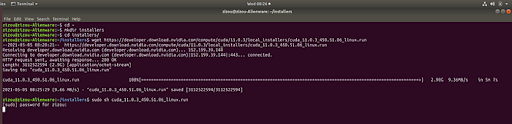
wget https://developer.download.nvidia.com/compute/cuda/11.0.3/local_installers/cuda_11.0.3_450.51.06_linux.run
sudo sh cuda_11.0.3_450.51.06_linux.run
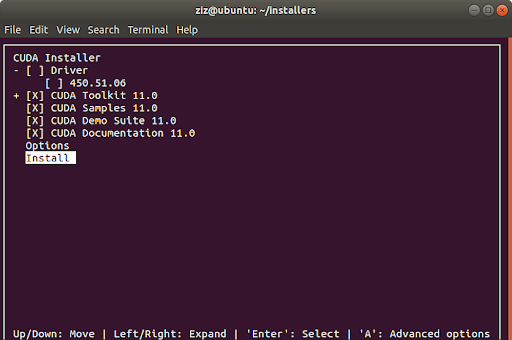
When the setup starts, accept the EULA agreement. Then on the next screen uncheck the NVIDIA driver option since we have already installed it manually earlier. Finally, press Enter to install CUDA.
You’ll see a summary at the end of the CUDA installation as shown below.
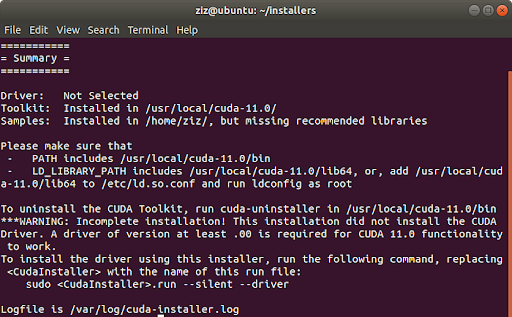
Next, open the bashrc script file using the following command.
nano ~/.bashrcAdd the following lines at the end of the bashrc file.
# NVIDIA CUDA TOOLKIT
export PATH=/usr/local/cuda-11.0/bin${PATH:+:${PATH}}
export LD_LIBRARY_PATH=/usr/local/cuda-11.0/lib64${LD_LIBRARY_PATH:+:${LD_LIBRARY_PATH}}

The bashrc file looks like below:
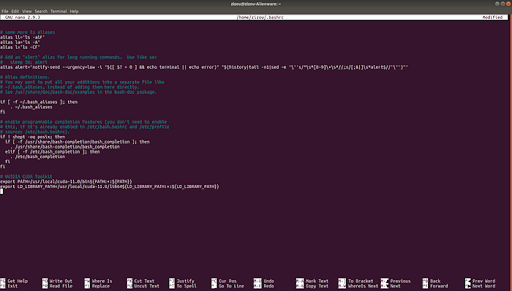
Press “Ctrl + x, y”, and “Enter” to save changes.
Run the source command to update your current shell environment.
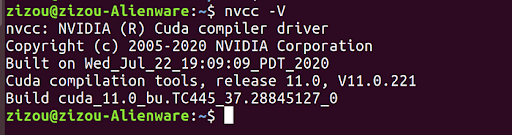
source ~/.bashrcThat’s it! We have successfully installed CUDA on our system. Run sudo reboot to restart your system for the new changes to take effect. After Ubuntu restarts, you can confirm your CUDA installation by running nvcc -V and nvidia-smi commands.
How to Download CUDNN in Linux
Once again, go to NVIDIA’s site and download the latest version of cuDNN for the latest CUDA toolkit version or visit the archive page to download a previous version of cuDNN that is compatible with your CUDA toolkit.
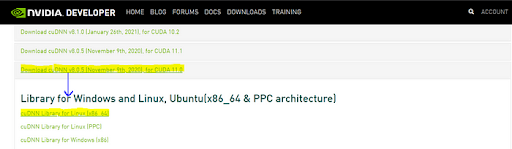
You have to be signed in using your NVIDIA account to download cuDNN. Since I have CUDA 11.0.1, I will download cuDNN 8.0.5 for CUDA 11.0.
Click on cuDNN 8.0.5 and select cuDNN Library for Linux (x86_64).
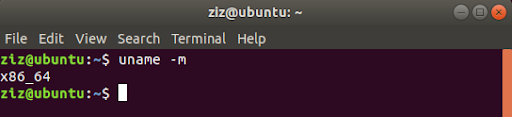
You can check your architecture using the command uname -m in a terminal.
Next, it will ask you to log in. Create an Nvidia account or sign in using Google or Facebook. Once logged in you can download the cuDNN file.
Copy the downloaded cuDNN zip file to the “installers” folder.
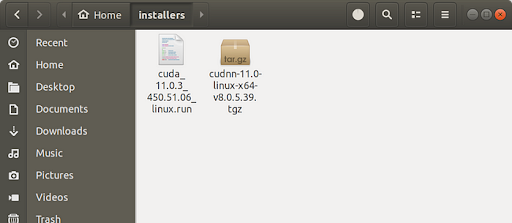
Unzip the cuDNN zip file using the following command. You will see a folder named “cuda” with “include” and “lib64” sub-folders in it after unzipping this.
tar -zxf cudnn-11.0-linux-x64-v8.0.5.39.tgz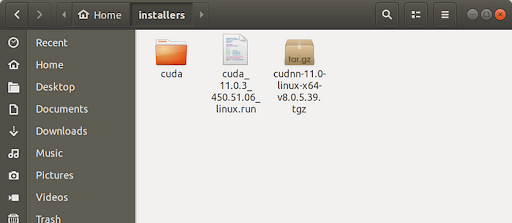
Next, we have to copy the contents of these sub-folders to the path where we installed CUDA in the first step above.
Copy content from the CUDA folder unzipped from cuDNN to the main CUDA directory.
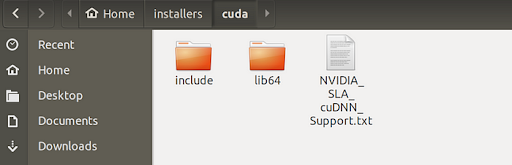
We need the contents of the “include” and “lib64” folders from cuDNN to be inside the include and “lib64” folders of the CUDA directory, where we installed CUDA shown in the first step. Run the following commands:
cd cuda
sudo cp -P lib64/* /usr/local/cuda/lib64/
sudo cp -P include/* /usr/local/cuda/include/

That’s it. We have successfully set up CUDA and cuDNN on our Linux Ubuntu 18.04 system.
Frequently Asked Questions
How do you download cuDNN for Windows?
- Install the latest version of cuDNN that matches your version of CUDA for Windows.
- Copy the contents of the CUDA folder inside the cuDNN folder to the path where we installed CUDA.
- Set environment variable to cuDNN.
- Set the system variable with the name cuDNN to point to the bin, include and lib folders.
- Add these same paths to both the cuDNN and Path System variables.
How do you download cuDNN for Linux?
- Select the version of cuDNN that matches your version of CUDA for Linux.
- Copy the downloaded cuDNN zip file to the installers folder.
- Unzip the cuDNN zip file using the following command: tar -zxf cudnn-11.0-linux-x64-v8.0.5.39.tgz
- Copy the contents of the bin, include and lib folders to the CUDA path.
- Copy the content from the CUDA folder unzipped from cuDNN to the main CUDA directory.
- Run the following commands: cd cuda; sudo cp -P lib64/* /usr/local/cuda/lib64/;sudo cp -P include/* /usr/local/cuda/include/