

Working in data science and having a background in technical writing, I’m naturally drawn to natural language processing (NLP). Machines understanding language fascinates me, and I often wonder which algorithms Aristotle would have used to build a rhetorical analysis machine if he had the chance.
If you’re new to data science, getting into NLP can seem complicated, especially since there are always new advancements in the field. It can be hard to know where to start.
What Is NLP?
The technology might sound complex, but have no fear! These three super simple projects will introduce evergreen NLP concepts and techniques to get you started.
-
Word Cloud
-
Spam Detection
-
Sentiment Analysis
The data used for these projects is the spam email data set; you can find all of the code in my GitHub.
What Can Machines Understand?
While a computer can actually be quite good at finding patterns and summarizing documents, it must first transform words into numbers before making sense of them. Machines learn thanks to mathematics but numbers and language don’t always talk to one another. Before transforming words into numbers, you’ve got to clean your data so the words are free of things like special characters and punctuation, then modified into forms that make them more uniform and interpretable.
Project 1: Word Cloud
We also call cleaning words “preprocessing” the data, which is the focus of our first project: word cloud.
Importing Dependencies and Data
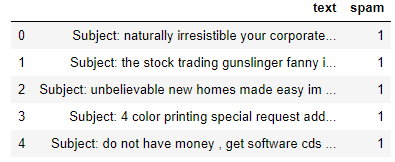
Start by importing the dependencies and the data. The data is stored as a comma separated values (csv) file, so I’ll use the Pandas read_csv() function to open it into a DataFrame.
import pandas as pd
import sqlite3
import regex as re
import matplotlib.pyplot as plt
from wordcloud import WordCloud


#create dataframe from csv
df = pd.read_csv('emails.csv')


df.head()
Exploratory Analysis
Next you’ll need to do a quick analysis of the data to eliminate duplicate rows and establish some baseline counts. I use Pandas drop_duplicates to drop the duplicate rows.
print("spam count: " +str(len(df.loc[df.spam==1])))
print("not spam count: " +str(len(df.loc[df.spam==0])))
print(df.shape)

df['spam'] = df['spam'].astype(int)
df = df.drop_duplicates()
df = df.reset_index(inplace = False)[['text','spam']]

print(df.shape)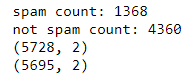
By the Way, What’s a Word Cloud?
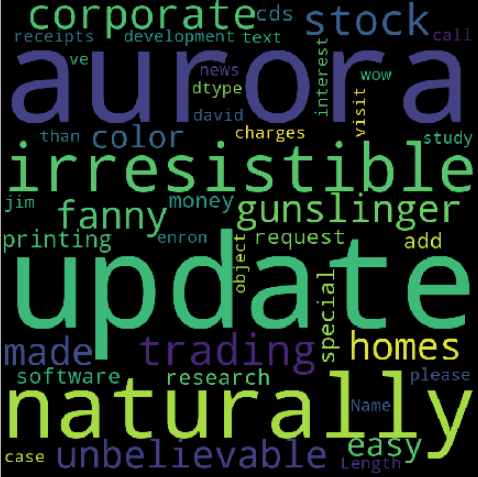
Word clouds are a useful way to visualize text data because they make understanding word frequency easier. Words that appear more frequently within an email text appear larger in the cloud, which makes identifying keywords easy.
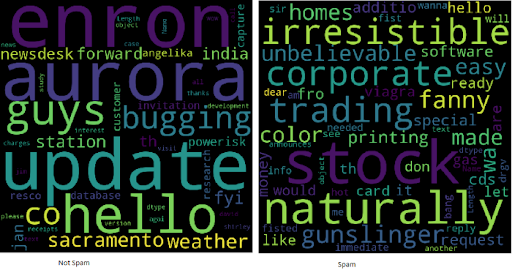
Notice in the above word cloud image, all the text is lowercase. There are no punctuation marks or special characters. That’s because we cleaned the text to make it easier to analyze. Using regular expressions, it’s easy to clean the text using a loop:
clean_desc = []
for w in range(len(df.text)):
    desc = df['text'][w].lower()

  #remove punctuation
  desc = re.sub('[^a-zA-Z]', ' ', desc)

  #remove tags
  desc=re.sub("</?.*?>"," <> ",desc)

  #remove digits and special chars
  desc=re.sub("(\\d|\\W)+"," ",desc)

    clean_desc.append(desc)

#assign the cleaned descriptions to the data frame
df['text'] = clean_desc

df.head(3)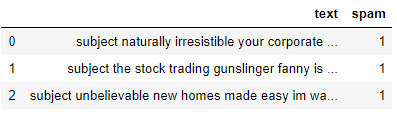
I start by creating an empty list named clean_desc. Next I use a for loop to go through the text line by line, setting all the text to lowercase, removing punctuation and special characters, then appending the text to the list. Finally, I replace the text column with the data in the clean_desc list.
Stop Words
Stop words are the most common words like “the” and “of.” Removing them from the email text allows more relevant words to stand out. Removing stop words is a common technique! Some Python libraries like NLTK come pre-loaded with a list of stop words, but it’s easy to create one from scratch.
stop_words = ['is','you','your','and', 'the', 'to', 'from', 'or', 'I', 'for', 'do', 'get', 'not', 'here', 'in', 'im', 'have', 'on', 're', 'new', 'subject']Notice I include a few email-related words like “re” and “subject.” It’s up to you to determine what words should be included or excluded. Sometimes it’s beneficial to include all words! It all depends on the specifics of your project.
Construct the Word Cloud
Conveniently there’s a Python library for creating word clouds, which you can install using pip.
pip install wordcloudWhen constructing the word cloud, you can set several parameters like height, width, stop words and max words. It is even possible to shape the word cloud instead of displaying the default rectangle.
wordcloud = WordCloud(width = 800, height = 800, background_color = 'black', stopwords = stop_words, max_words = 1000
                    , min_font_size = 20).generate(str(df1['text']))

#plot the word cloud
fig = plt.figure(figsize = (8,8), facecolor = None)
plt.imshow(wordcloud)
plt.axis('off')
plt.show()
You can save your word cloud and display it using Matplotlib and .show(). Here are the results of all the records (not taking into account whether or not the email is spam).
You can take the exercise to the next level by splitting the data frame and making two word clouds to help analyze the difference between keywords used in spam and non-spam emails.
Project 2: Spam Detection
This is a binary classification problem since an email can either be spam (1) or not spam (0). I want to build a machine learning model that can identify whether or not an email is spam and I’ll use the Python library scikit-learn to explore tokenization, vectorization and statistical classification algorithms.
Import Dependencies
First, import the scikit-learn functionality we need to transform and model the data. I’ll use CountVectorizer, train_test_split, ensemble models and a couple metrics.
from sklearn.feature_extraction.text import CountVectorizer
from sklearn.model_selection import train_test_split
from sklearn import ensemble
from sklearn.metrics import classification_report, accuracy_score
Transforming Text to Numbers
When you look at a word cloud, notice they’re primarily single words. The larger the font size, the higher its frequency in the data set. To prevent the word cloud from outputting sentences, the text goes through tokenization, the process of breaking down a sentence into the individual words (tokens).
Using scikit-learn’s CountVectorizer(), it’s easy to transform the body of text into a sparse matrix of numbers that the computer can pass to machine learning algorithms. To simplify the concept of count vectorization, imagine you have two sentences:
The dog is white
The cat is black
Converting the sentences to a vector space model would transform them in such a way that looks at the words in all sentences, then represents the words in the sentence with a number.
The dog cat is white black
The dog is white = [1,1,0,1,1,0]
The cat is black = [1,0,1,1,0,1]
We can show this using code as well. I’ll add a third sentence to show the code counts the tokens.
#list of sentences
text = ["the dog is white", "the cat is black", "the cat and the dog are friends"]

#instantiate the class
cv = CountVectorizer()

#tokenize and build vocab
cv.fit(text)

print(cv.vocabulary_)

#transform the text
vector = cv.transform(text)

print(vector.toarray())
Notice in the last vector, you can see a 2 since the word “the” appears twice. The CountVectorizer is counting the tokens and allowing me to construct the sparse matrix containing the transformed words to numbers.
Bag of Words Method
Because the model doesn’t take word placement into account, and instead mixes the words up as if they were tiles in a scrabble game, we call this bag of words method. I’ll create the sparse matrix, then split the data using scikit-learn train_test_split().
text_vec = CountVectorizer().fit_transform(df['text'])

X_train, X_test, y_train, y_test = train_test_split(text_vec, df['spam'], test_size = 0.45, random_state = 42, shuffle = True)
Notice I set the sparse matrix text_vec to X and the df[‘spam’] column to Y. I shuffle and take a test size of 45 percent.
The Classifier
I highly recommend experimenting with several classifiers to determine which one works best for this scenario. In this example, I’m using the GradientBoostingClassifier() model from the scikit-learn ensemble collection.
classifier = ensemble.GradientBoostingClassifier(
  n_estimators = 100, #how many decision trees to build
  learning_rate = 0.5, #learning rate
  max_depth = 6
)
Each algorithm will have its own set of parameters you can tweak; this process is called hyper-parameter tuning. Go through the documentation to learn more about each of the parameters used in the models.
Generate Predictions
Finally, we fit the data, call predict and generate the classification report. Using classification_report(), it’s easy to build a text report showing the main classification metrics.
classifier.fit(X_train, y_train)
predictions = classifier.predict(X_test)

print(classification_report(y_test, predictions))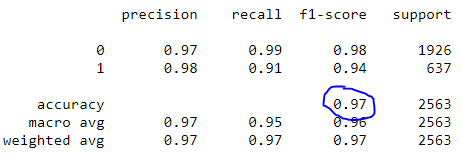
Notice our model achieved 97 percent accuracy. You can take this project to the next level by tweaking the hyper-parameters, exploring different classifiers and trying different vectorizers!
Project 3: Sentiment Analysis
Sentiment analysis is also a classification problem of sorts. The text will reflect a positive, neutral or negative sentiment, otherwise known as the polarity of the text. You can also gauge and account for the subjectivity of the text! There are a ton of great resources that cover the theory behind sentiment analysis.
Instead of building another model, this project uses a simple, out-of-box tool to analyze sentiment: TextBlob. I’ll use TextBlob to add sentiment columns to the DataFrame for analysis.
What Is TextBlob?
Built on top of NLTK and pattern, the TextBlob library for Python 2 and 3 simplifies several text processing tasks and provides tools for classification, part-of-speech tagging, noun phrase extraction, sentiment analysis and more. Install it using pip and check out the installation guide.
pip install -U textblob
python -m textblob.download_corporaTextBlob Sentiment
Using the sentiment property, TextBlob returns a named tuple of the form Sentiment(polarity, subjectivity). Polarity is a float in the range [-1.0, 1.0] where -1 is the most negative and 1 is the most positive. Subjectivity is a float in the range [0.0, 1.0] where 0.0 is very objective and 1.0 is very subjective.
blob = TextBlob("This is a good example of a TextBlob")

print(blob)blob.sentiment


#Sentiment(polarity=0.7, subjectivity=0.6000000000000001)
Applying TextBlob
Using list comprehensions, it’s easy to load the text column as a TextBlob, then create two new columns to store the Polarity and Subjectivity.
#load the descriptions into textblob
email_blob = [TextBlob(text) for text in df['text']]


#add the sentiment metrics to the dataframe
df['tb_Pol'] = [b.sentiment.polarity for b in email_blob]
df['tb_Subj'] = [b.sentiment.subjectivity for b in email_blob]


#show dataframe
df.head(3)
TextBlob makes it super simple to generate a baseline sentiment score for polarity and subjectivity. To take this a step further, see if you can add these new features to the spam detection model to increase the accuracy!
Even though natural language processing can seem intimidating, the foundational pieces are pretty simple. There are plenty of libraries that make it easy to begin exploring data science and NLP. These three projects will help you explore concrete ways to apply preprocessing, tokenization, vectorization and feature engineering on text data.
Frequently Asked Questions
What is natural language processing (NLP)?
NLP is a field of data science that uses mathematical models to help computers understand, analyze and predict text or speech.
Why is text preprocessing important in NLP?
Preprocessing cleans text by removing punctuation, special characters and formatting inconsistencies, making it easier for algorithms to analyze the data.
What is a word cloud and how is it used in NLP?
A word cloud visualizes word frequency in a dataset, highlighting commonly used terms in larger font sizes for easier keyword analysis.
What is tokenization in NLP?
Tokenization breaks down text into individual words or tokens, enabling numerical representation and machine processing.


