Have you ever found yourself in a situation where it became difficult to decipher your own codebase? Do you often end up with multiple files like untitled1.py or untitled2.ipynb? Most of us have had to bear the brunt of bad coding practices on more than one occasion. The situation is even more common for data scientists because we tend to limit our focus on the analysis and the end product while ignoring the quality of the code that’s responsible for the analysis.
How to Automate Your Data Science Project Structure in 3 Easy Steps
- Automate project template creation with Cookiecutter Data Science.
- Create a Good README With readme.so.
- Push Your Code to GitHub.
Why is reproducibility a vital ingredient in the data science pipeline? I’ve touched upon this topic before: A reproducible example allows someone else to recreate your analysis using the same data. This makes a lot of sense since you put your work out in the public for others to use but we defeat the purpose if others can’t reproduce our work. More importantly, as Dr. Rachael Tatman, put it:
“Why should you care about reproducibility? Because the person most likely to need to reproduce your work… is you.”
In this article, let’s look at three useful tools that can help you create structured, reproducible projects. Here’s an end-to-end video showcasing the tools used below.
How to Create a Good Project Structure
Let’s say you want to create a project that contains code to analyze the movie review sentiments. There are three essential steps to creating a good project structure:

1. Automate Project Template Creation With Cookiecutter Data Science
There isn’t a clear consensus in the community on best practices for organizing machine learning projects. As a result, there are a plethora of choices, which has ultimately led to a lot of confusion. Fortunately, there is a workaround, thanks to people at DrivenData. They have created a tool called Cookiecutter Data Science, a standardized but flexible project structure for doing and sharing data science work. A few lines of code sets up a whole series of subdirectories and makes it easier to start, structure and share analysis. You can read more about the tool on their project home page. Let’s get to the interesting part and see Cookiecutter Data Science In action.
Install Cookiecutter Data Science
pip install cookiecutter
or
conda config --add channels conda-forge
conda install cookiecutter
Start a New Project
Head over to your terminal and run the following command. It will automatically populate a directory with the required files.
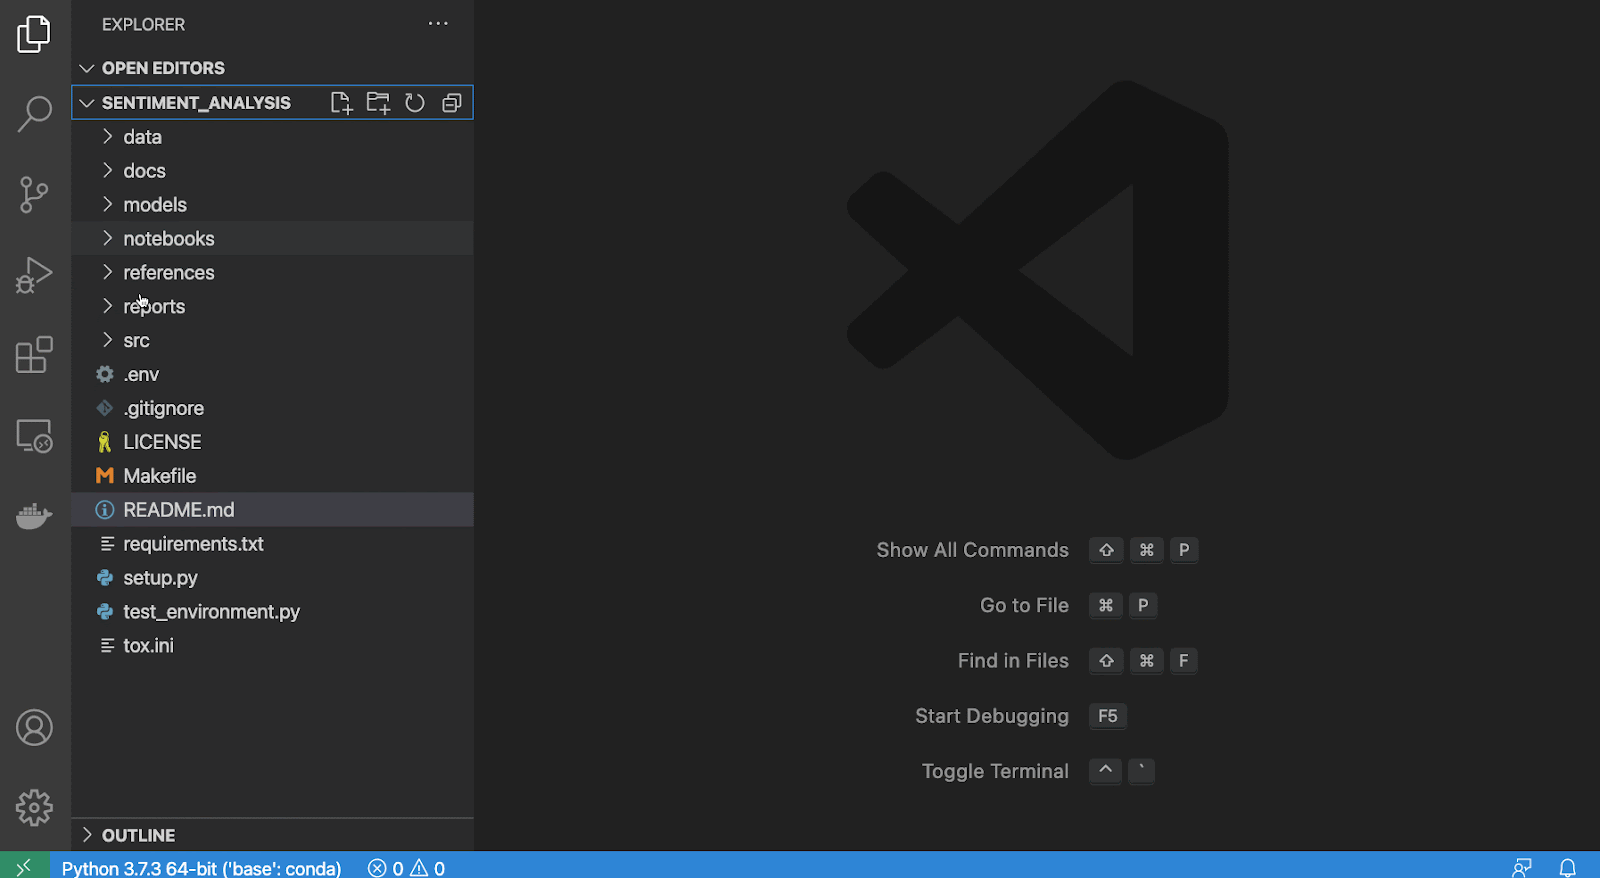
A sentiment analysis project directory gets created on the specified path, which is the desktop in this particular case.

Note: Cookiecutter Data Science will be moving to version two soon so there will be slight changes in how you’ll use the command. This means you’ll have to use ccds ... rather than cookiecutter ... in the command above. As per the GitHub repository, this version of the template will still be available but one would have to explicitly use -c v1 to select it.
2. Create a Good Readme With readme.so
After creating the skeleton of the project, you need to populate it. But before that, there is an important file to be updated — the README. A README is a markdown file that communicates essential information about your project. It tells others what the project is about, the project’s license, how others can contribute to the project, etc. I’ve seen many people putting tremendous effort into their projects but failing to create decent README files. If you’re one of them, there’s good news in the form of a project called readme.so.
A kind soul has put an end to writing READMEs manually: Katherine Peterson recently created a simple editor allowing you to create and customize your project’s README quickly.
The editor is pretty intuitive. You only need to click on a section to edit the content, and then the section gets added to your README. Choose the ones you like from an extensive collection. You can also move the sections depending upon the location where you want them on the page. Once you have all things in place, go ahead and copy the content or download the file and add it to your existing project.

3. Push Your Code to GitHub
We are almost done. The only thing left is to push the code to GitHub (or any version control platform of your choice). You can do that easily via Git. Here is a handy cheat sheet.
Alternatively, if you use Visual Studio Code (VS Code), like me, you don’t need to do anything. VS Code makes it possible to publish any project directly to GitHub without having to create a repository first. VS Code will create the repository for you and control whether or not it should be public or private. The only thing required from your side is to provide authentication to GitHub through VS Code.
That’s all you need to set up a robust and structured project base. I’ve summarized all the above steps in this video in case you want to look at all the steps in sync.
Creating structured and reproducible projects might seem difficult or tedious in the beginning but taking the time to do it offers many advantages in the long run.