

GitHub is one of the most popular tools that companies and individuals use to host and version control source code repositories. The platform runs by using using Git software, which helps track code changes and streamline development collaboration. GitHub has been constantly improving the software developer experience and keeps launching new features to enhance automation and encourage even more collaboration between dev teams — with one of those features being GitHub Pages.
What is GitHub Pages?
GitHub Pages is a feature of GitHub that lets you host static websites from GitHub repositories and make them publicly available. GitHub Pages can be used to create websites for project documentation, online blogs, landing pages and more from personal code.
GitHub Pages is a feature of GitHub that lets you host static websites from GitHub repositories and make them publicly available or even privately accessible within your team and organization. From your personal website and portfolio to your project’s documentation, GitHub Pages can help you launch websites in a matter of minutes. You will even get a URL in the form https://.github.io that you can share with the world to make your website(s) accessible to others.
But how do you do that? Well, I promise it’s not going to take more than a couple of minutes. In the following sections I’m going to outline a step-by-step process you can follow to get started with GitHub Pages and bring your first GitHub-hosted website to life.
How to Host a Website Using GitHub Pages
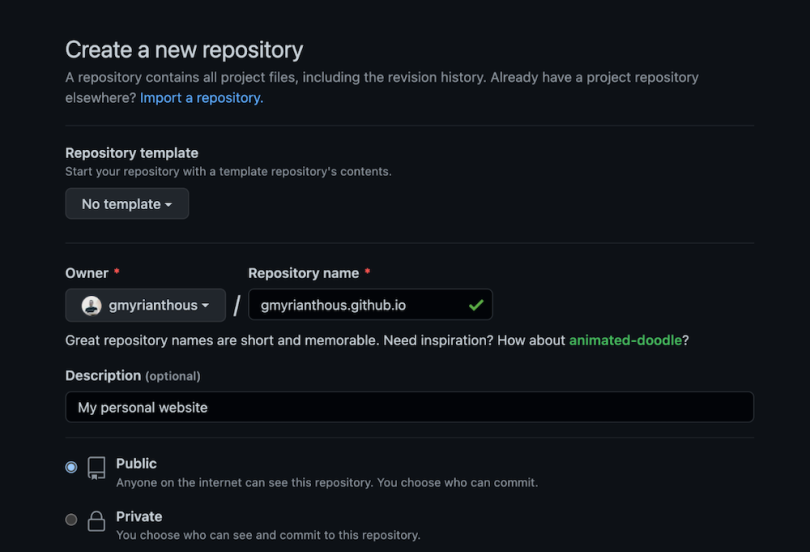
1. Create a GitHub Repository
Login to your GitHub account and create a new public repository named <username>.github.io, where the username should either be your personal GitHub username or the username your organization uses.
2. Clone the Repository on Your Local Machine
Now that you’ve created the public repository on GitHub, you’ll then have to clone it to your local machine. To do so, simply open the terminal on your computer and run the following command (in whatever directory/folder you prefer):
git clone https://github.com/username/username.github.ioAgain, make sure to replace the username references to your own GitHub username. Note that, while cloning the repository, you will get the following warning message
Cloning into 'gmyrianthous.github.io'...
warning: You appear to have cloned an empty repository.
This is absolutely fine, however, given that the repository is currently empty. So, let’s move on to the next step.
3. Create an Index.html File in Your Project’s Directory
Now head to your recently cloned repository and create an index.html file.
$ cd <username>.github.io
$ touch index.html
$ echo "Hello, world! This is my personal page hosted on GitHub pages." > index.html
And let’s double-check that the content we have just appended to the index.html file is indeed there:
$ cat index.html
Hello, world! This is my personal page hosted on GitHub pages.
4. Push the Local Changes to the Remote Host
Now that we have created the index file that is supposed to be presented on the website, we need to create a commit and push it to the remote host. To do so, let’s run the following commands.
$ git add index.html
$ git commit -m "Add index.html file"
$ git push -u origin main
5. Open a Browser and View Your Website
Open your preferred browser, type your website’s URL (<username>.github.io) into your browser’s address bar and voila! Your page should now be hosted through GitHub Pages and publicly accessible to the outside world.

Note that if you attempt to access the page immediately, you may get a 404 error. Just be patient and wait for a minute or so and you will then be able to access your page.
Customizing Your GitHub Pages Website
Now that your GitHub Pages website has launched, you may want to make some changes to it and customize it to your liking. Here’s how to customize your website’s method of deployment as well as how to create a custom site URL.
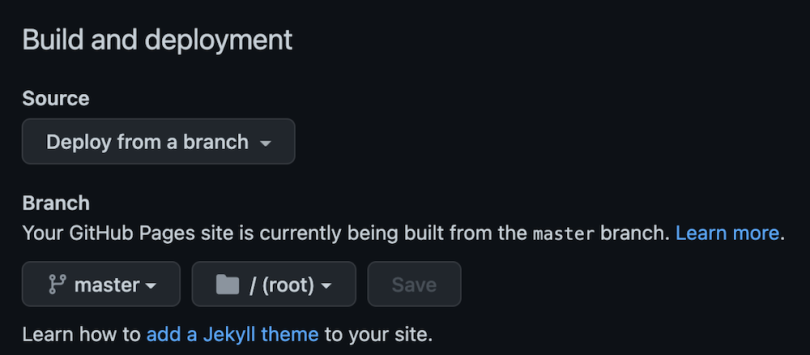
How to Customize the Deployment of Your Site
Note that, by default, GitHub Pages will deploy the content of your repository from the main branch. If you’d like to alter this behavior, take these steps:
- Click on the repository settings tab.
- From the left-hand side menu, click Pages under the Code and Automation section.
- In the Build and Deployment section, choose the branch (and optionally sub-directory) from which you would like GitHub Pages to deploy your website.
How to Use a Custom Domain on GitHub Pages
Note that GitHub Pages supports the use of custom domains as well as the change of the root URL to any sub-domain you own. It supports the following three types of domains:
- www subdomain (e.g., www.mysite.com )
- Custom subdomains (e.g., portfolio.mysite.com )
- Apex domains (e.g., mysite.com)
To alter the default domain:
- Click on the repository settings tab
- From the left-hand side menu, click Pages under the Code and Automation section
- In the Custom domain section, pick your custom domain

Get Started With GitHub Pages
If you are looking to host static websites easily and for free, look no more — GitHub Pages should be among the top options on your list. Whether it comes down to your personal website or project page, you can use this guide to get it up and running in just a few minutes.
Frequently Asked Questions
What is the difference between GitHub and GitHub Pages?
GitHub is a web-based platform for coding collaboration. It operates using Git, a distributed version control system that can track changes to source code and mirror them for developers accessing the same project.
GitHub Pages is a feature of GitHub that lets users host a website using code from their own GitHub repositories.
What is GitHub used for?
GitHub is used by software developers to store, manage and collaborate on open-source coding projects or computer files in real time. The platform also offers features like CI/CD automation, permission management and private repositories to facilitate projects at any scale.
GitHub acts as a social networking hub for software developers as well, allowing users to share public repositories and engage in development discussions.
How much does GitHub Pages cost?
GitHub Pages is free of charge for every GitHub user.
It is available in public GitHub repositories with a GitHub Free account, plus available in public and private GitHub repositories with a GitHub Pro, GitHub Team or GitHub Enterprise account.


